Showing posts with label Rough Construction. Show all posts

Tuesday, August 22, 2017

Amost done with 1st floor logs

We’re nearing another crossroads- the logs are about 12 feet off the ground, which means they are about 9 feet up from the piers, and about 8 feet up from the finished floor height. All of which means we have to start thinking about the second floor. But first, I’ll summarize what’s happened since my last post.
36680426186_acbd282bde_k

Improving techniques

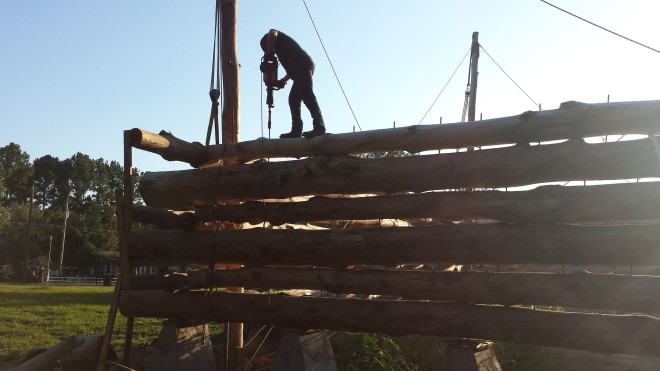
Jack hammer is pretty good

The jack hammer cost me about $130. I don’t know if it’s a monster jack hammer or just a regular one, having never owned a jack hammer before now. But it is definitely heavy- I think it weighs close to 50 pounds. I also ordered a “rod driver bit” to go with it. The rod driver bit is usually for driving electrical grounding rods into the ground. If your home was built in the last 20 years or so, you probably have one of these- it’s to prevent an electrical surge from frying the wiring in your house. The contractor will hammer a 6 foot piece of (usually) copper into the ground, and the easiest way to do it is with a jack hammer.
36173202440_19f0f25657_k
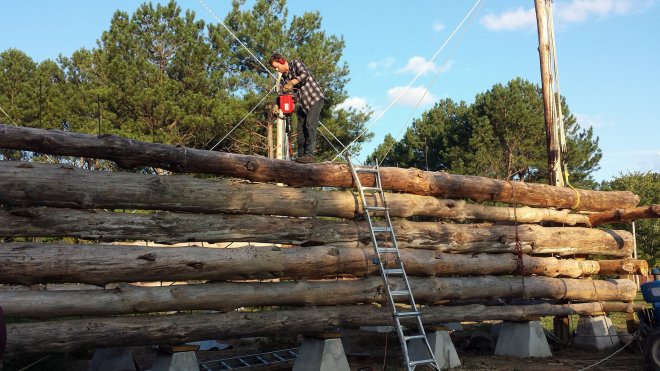
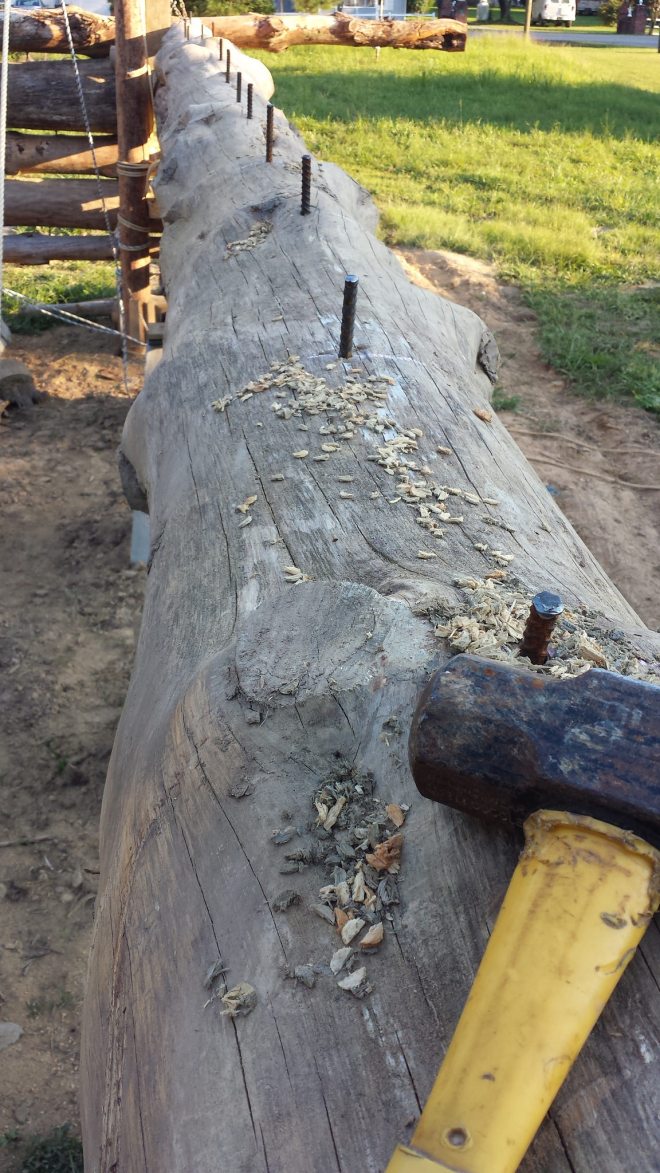
Driving rebar into logs is pretty much the same idea. The bit is just a shaft with a cylindrical hole in the end that fits over the rebar. I drive the rebar as far as I can into the log which leaves about 3 inches for me to finish pounding in by hand, which is very do-able, and it sure beats pounding the whole 20 inch piece of rebar with a sledge hammer. Instead of taking about 8 minutes per rebar, it now takes about 10-20 seconds with the jack hammer, and then about 1 minute with the sledge hammer. So I can finish pinning an entire log in about 30 minutes, instead of about 2 hours. And not as tired, either.
35892204874_f8dcd262d7_k1

Chainsaw needs some adjusting

Last night, my neighbor was asking how it’s going- I told him slow.  When making any straight down cut with my chainsaw lately, the saw wants to veer off towards the left and do this weird curvy cut. The neighbor asked if the blade was straight- yeah, I just bought it about two weeks ago. Then he asked when the last time I sharpened it, was I sitting behind the saw or in front of it? Ummmmm- I was sitting behind it. He said try sharpening it with the blade facing me- sitting behind it makes one set of teeth uneven. Huh. I had no idea, so I tried it on Saturday: I cleaned the whole thing, sharpened it, and went that afternoon to make some cuts- nope. Still curvy. My other saw- the McCollough- gave up the ghost. The repair shop said the piston and rings are no good, and the saw is so old, they don’t make parts for them. I’m going to try another blade and chain on my Husky, since it looks like I’ll be using this saw for quite a while yet.

What are temporary lifting poles?

This is a necessity. What happens is this: all of our logs are crooked, and we are using the crookedest ones first because of all the doors and windows on the first floor- the doors and windows make it easy to cut the crookedest part of the log right at the door or window, and then roll the log this way and that way to make it sit better and get it straightened out for pinning.
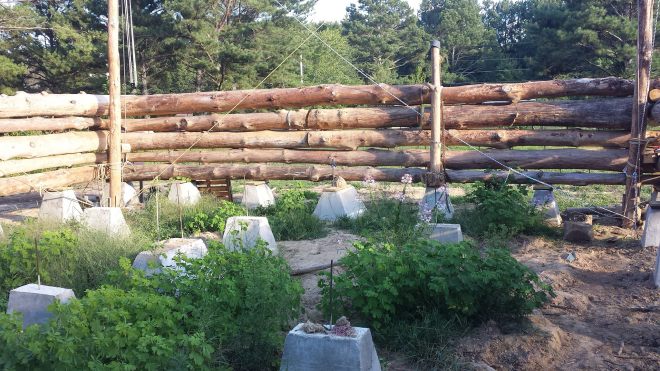
The problem is that when you cut a log in the middle, you have to support it somehow. With the lifting poles in the corner, you need something temporary to hold the log at the cut so it doesn’t roll off the wall. So I use the last 10 – 15 feet of a log as a temporary lifting pole, and stand it up on the pier. I chain-bind it to the existing wall logs, and put a pulley or chain hoist on top and suspend the log I’m about to cut with it. I make the cut, do any adjusting to straighten out the bows or knots, and then pin the log. Then I take down the lifting pole and use it for the next location.
35917504683_eacec3339d_k
see the short temporary lifting pole on that almost center pier?

Plans change…

We wanted a back door, we didn’t want one….Now we want one. While stacking logs, it became apparent that if we added a door on the back of the house, we could use more logs that were crooked. We also redesigned the kitchen- now, instead of separating the laundry room from the kitchen with a wall, we took out the wall between the kitchen and laundry on the plans, and opened up the laundry area and kitchen to each other. Now, when you enter the house from the side-back door, the laundry is on the right, and the kitchen is on the left- opening up a lot more space. I still need to update the CAD drawings, but I’ll get to it eventually. So far, the inspector hasn’t come out and asked to see the plans, and the copy I emailed him- well, he said it was too small to read. If I update them before he asks for them….I guess he’ll never know the difference?

Next item, please

At this point in their builds, many LHBA members begin to put in the RPSL logs that hold up the roof. These logs are bolted to the wall logs at the front and back center of the house, and will be 30 feet tall in our case. The reasoning on why to put them in at this point is that if the walls are higher than the fifth or sixth course, it’s too hard to get them over the wall. In our case, with a pier foundation, we can just slide them under the house, then lift them up on the inside. Our “advantage” is that our house is forty feet long, which makes it easy to work with a thirty foot log inside it. Our other “advantage” is that we are using lifting poles and block and tackle instead of a telehandler.
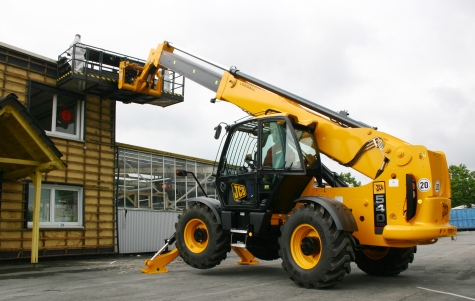
NC-3187-540-170
I put “advantage” in quotes because most folks using a telehandler would snicker about how these two items- a forty foot home and lifting poles – are an advantage.
But they would probably admit that I’m right in this case. Of course, they would say all the advantages of otherwise having a telehandler outweigh these two drawbacks, whereupon I am reminded that a cheap telehandler is about $8,000 (I’m guessing the one in the photo would be about $70K+), whereas my lifting poles were free, and my lifting equipment was about $400. Sure, they’re slow, but I’ve already had a guy who is using a crane on his build state that I’m stacking faster than he is. Weird.
I guess we’ll wait to do the RPSL’s. The book shows a diagram of how to lift the girder log and RPSL’s and the ridge pole into place using nothing but block and tackle. Sort of a step-by-step. It looks like if we finish the walls first, we can use the walls to attach rigging anywhere we want and get the RPSL’s “just so”. If I try to get them in now, the only thing I have that’s taller that the RPSL’s now is my corner lifting poles, and I don’t want to put that much lateral force on the poles- they could snap off if I lift something very heavy too far away from their centers.

36680425856_13c78431d0_h
While we weren’t watching, she was having fun with the camera…..
That’s where we’re at for now. Feel free to comment below.

Thursday, July 6, 2017

How to make your own triple blocks for less than $45

Why a triple block? Why not a double? or a single?

Because two triple blocks working together gives you a 7:1 mechanical advantage- 5,000 lb log requires only ~720 lbs of force to lift. And you can use just 5/8″ thick rope to lift 720 lbs. A double block would only reduce the force down to 1,250 lb. But you have to double that- for each end of the log. And a single……ummmmm…..there’s no mechanical advantage to a single. Stop talking about single pulleys. On the other end, a “quadruple” block doesn’t really exist beyond huge construction cranes with wire rope- from what I’ve seen and read, anything more than three pulleys and the friction increases beyond the efficiency gained. So, a triple block it is.
First, I looked online. And found…..not quite nothing, but almost. It’s unbelievable in this age of Amazon and Ebay that you can’t find a triple block with more than 3,000 pound capacity. I suppose not many people are lifting heavy objects by hand. Ok, you can find them, but they are insanely expensive, and you need two to make a set. Not to mention you need four sets to work efficiently. Look at that price:2017-07-03-22-48-53_scrot
I mean, I guess you could climb a 30-foot lifting pole and change the block and tackle out every time you want to lift a log, but you would still need four pulleys- two on each pole- to lift each log. So, it would cost you $1,300, plus rope (about $300).
This calls for a cheaper solution:

Enter Harbor Freight:

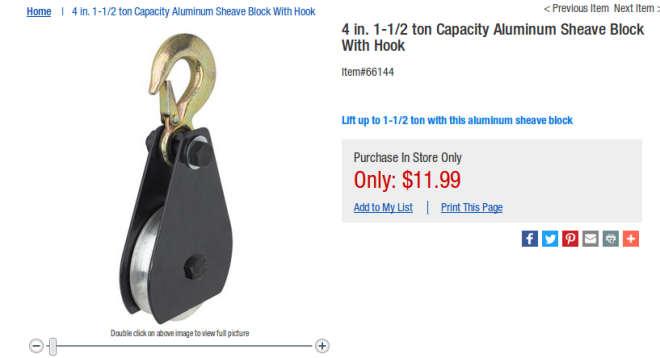
2017-07-03-23-07-00_scrot
Of course, I’d need six of them to make a set, but that’s only $72, not $327. And some grade 8 bolts, which are easy to obtain from Fastenall.
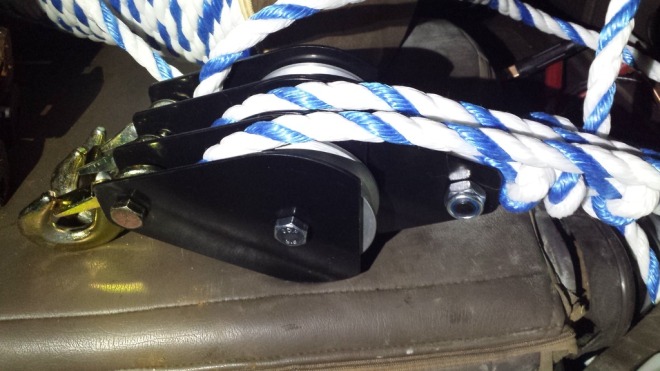
Here’s what I came up with:20170705_204824_zpsm7auqpcv


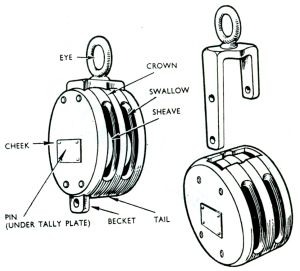
Some more notes: I needed somewhere to tie the end of the rope- on the antique pulleys, there’s a place called a becket 70d1a3c340f41214567fd48f2725ccd9--block-and-tackle-pulley-light. I didn’t have one, so I took two extra plates from a single pulley, and put a bolt through them.
The results

I just finished lifting the biggest log yet- over 6 feet around at the base, and 50+ feet long- I figure it weighs around 6,000 lbs. The pulley held just fine- in fact, it held better than the #6 triples that I had on the opposite end. The singles (on the box) were originally rated for 3,000 lbs, so I figure the modified triple is worth at least that much, but with that huge log, probably more like 4,000 lbs.
I spent $12 per pulley x 3 pulleys = $36. The two grade 8 bolts were about $4 each. So for ~$45, I got what normally costs over $300.

Thursday, June 22, 2017

First Layer Done


20170621_191651_zps7mylvvyk

This is a great feeling- The lifting poles worked, the pulleys and chain hoists worked, we figured out the kinks and got all four logs on the piers. It looks less like a grave yard with tombstones sticking up, and more like a….well, at least a perimeter with big posts sticking out of it: There was a little preparation required before setting the logs down on the piers:

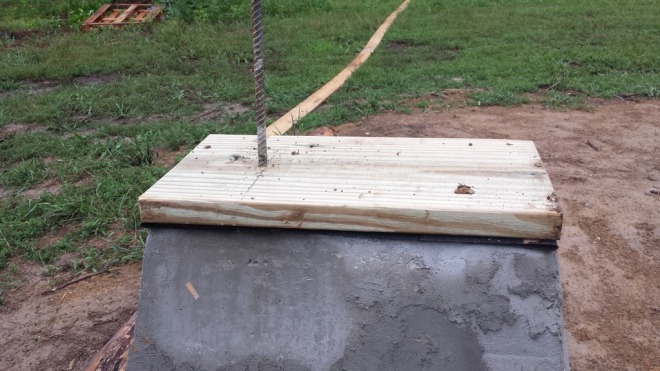
20170615_183820_zpsgquk3nsvThat’s pressure treated #2 pine – 2×12 from the local hardware store, laying on top of a shingle (90lb builder’s felt) that I sourced from the county dump (they were new in the plastic, so I scooped up a bunch).
We set the first log, then I had this nagging feeling that I was supposed to call the inspector before stacking logs. I was pretty sure he would find something wrong with the concrete. I checked the inspection schedule and it said a post-pour inspection was due, so I worked up the motivation and finally called him. He said- “No, go ahead and keep doing what you’re doing- call me when you get to the rough in.” Ok! We’re on a roll now. The rough in is when you have your electrical outlets and wires run, along with the plumbing, but you haven’t put any drywall in (yes, we will have framed walls inside the cabin, just like a normal home).

Piqued their interest


With four 30-foot lifting poles sticking up in the air, our property has become something of an attraction. Everyone from the water utility guys, to the motorcycle guy down the road slows down and takes a gander every time they drive by. The utility guys actually drove onto the property and looked over the mechanics of everything- according to one neighbor they were there for over an hour checking out the ropes, pulleys, rebar, and logs. The neighbors say this build is the “talk of the town”. Everyone is so nice and excited. Now when I’m out there working, I’ve seen several cars every day slow down to look. I’ve seen some stop, then back up, stare, then wave, and drive on slowly. A few have even pulled up, just to say hi (and get a closer look). The older guys who stop by tell me if they were 10-20 years younger, they’d be doing this too. It’s nice- the positive support is great motivation.  I usually wave and continue on with my business. The permit office lady saw me at the store last night. She said the utility guys had their doubts, but she set them straight- “Don’t worry- he’s an engineer- he’s got it all figured out.” Wellllllllllll……yeah. I’d like to think I’m more of a mathematician, you know, because that’s what my degree is in, but ok…….


A few notes about the method


If we were laying 2×4’s, it would be pretty easy- draw a center line on the 2×4, measure the distance between each piece of rebar, drill holes, place 2×4 on the pier, done. Logs are a little more hairy….
  • Curvy logs

They are not straight- and they may curve in more than one direction. Also there are a lot of knots on this wood. Finally, the logs have a lot of taper, which is a comparison of bottom diameter to the top diameter. The taper is a measure how much the diameter decreases from the bottom to the top.  LHBA recommends logs have a taper of less than 1 inch for every 10 feet. Our logs are about 20″ on the bottom, and 12″ at the top, and 40+ feet long. Our taper works out to be 20-12 = 8″ over 40 feet, or 2″ every 10′- double what LHBA recommends. But LHBA also recommends building with what you have. It can be done, but adds a level of complication when you try to level the structure. Probably more on that will come as we stack logs- each layer, you alternate butts and tops: where the butts are on one layer, is where the tops will be on next layer. If you “mind your levels”, i.e., measure the height at each corner as you stack, you can pick logs that match each other. The goal is less than 1/2″ height difference between all corners at the top of the walls.
  • Block and tackle

1489785074404_zpsq4tepvus
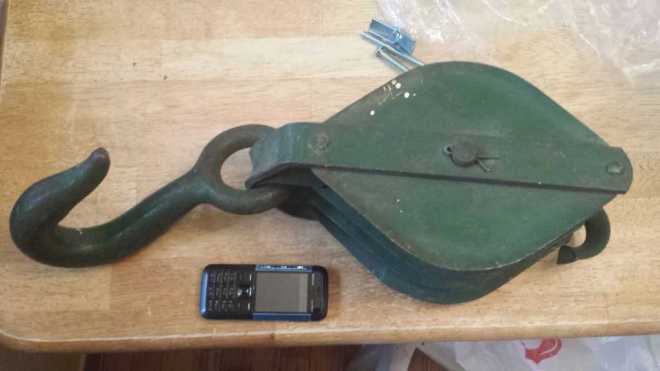
I’m using antique triple blocks that weigh about 20 lbs each. I need two for each pole- one on top and one on the bottom. They are rated at I-don’t-know-but-I’m-sure-it’s-a-lot pounds. They are not made anymore because no one does it like this. The physics behind them is pretty cool. My rope is rated at about 800 lbs, but the logs weigh between 3,000 – 6,000 lbs. Using the triple blocks, I’m gaining a 7:1 advantage- 850 lbs per log, but since I’m using 2 sets of blocks- one on each pole, it’s really 850/2 = 425 lbs per log…..Well, I thought it was cool.
  • Other equipment

I’m also using 6,400 lb straps from Harbor Freight, a Cant Hook (or “can” hook ), my wife’s Landcruiser (helps center the logs over the rebar), a chain saw, sledge hammer, some trucker chains (5,400 lb) and my trusty tractor.
  • The process for the first course

The first course is different from all the other layers- you are putting the log down on the rebar (cemented into the piers), instead of pounding the rebar into the log (like on the rest of the courses).

I stair-stepped the rebar before putting the logs on: I cut the longest rebar to 30″, then made the one next to it 28″, then 26″, etc. This helps when lowering the log so you only have to mind getting one piece of rebar in the log at at time.
I also tried the recommended template approach- lay a strip of 1×4 on the piers and mark where the rebar is, turn the log upside down and mark the holes on the log- but they were so bumpy and long that it didn’t work. I asked around- and found a method using string- attach a string to the piers, and measure the offset of the rebar from the string, (remembering that if the rebar is 1″ to the right of the string, the hole will be drilled 1″ to the left of the center mark on the log (because the log is upside down)).  Transfer this info to the log, then drill straight down. Flip the log over (flip is a generous word), then attach to lifting straps, pull until it’s over the rebar. Then slowly lower the log until the rebar can be fed into the hole in the log (done by my wife).

Summary

This is very exciting. All the work for the past year+ designing our plans, getting utilities installed, cutting down trees, borating them, removing branches, burning brush piles, digging holes, building forms, fixing the tractor, and on and on- got us to this point. I guess you could say we are done with phase I. Phase II will be getting the rough in complete- the goal is to get the roof on this year (by New Years Eve). Phase III will be finishing the inside. So I’ll just say thanks for coming on this journey with us. Feel free to leave comments.

Next up is the rest of the courses- these are placed on top of the log below, pilot holes drilled, then rebar is pounded through log and halfway into the log below- every two feet, and offset by one foot on alternating rows.