The method
 Each complete layer of logs (made up of all the logs that are on the
same level) is called a “course”. The logs are oriented in alternating
pin-wheel courses- and by pinwheel, I mean at each corner, one end of
each log “passes” a log that is “butted” up against it. On the next
course, you reverse the butts and passes at that same corner, and on and
on.
Each complete layer of logs (made up of all the logs that are on the
same level) is called a “course”. The logs are oriented in alternating
pin-wheel courses- and by pinwheel, I mean at each corner, one end of
each log “passes” a log that is “butted” up against it. On the next
course, you reverse the butts and passes at that same corner, and on and
on.Each log is pinned with rebar to the layer below- every 2 feet. I won’t bore you with too many of the details, but it is a lot of work: for 1/2″ rebar, you drill a 1/2″ hole through the top log. You beat the rebar into the hole, and then halfway through the log beneath it – and you don’t drill into the log beneath for strength purposes. You can do the math- a 40 foot log requires 20 pieces of rebar, so each course requires at least 80 pieces of rebar. I’m on course four, so that’s 320 pieces so far. By hand, with a sledge hammer. I go through at least a gallon of water every evening. The LHBA recommends everyone do the first two courses by hand, and then buy a jack hammer for the courses after that. So, I did my due diligence, and have now graduated:
It’ll be here this week, along with a rod driver bit.
The logs…..are fickle: I made a spreadsheet to catalog the logs by size, length, cut date, peel date, etc, but I haven’t used it yet for stacking logs. My wife has taken over that role, and is doing an awesome job. Usually, our evening goes something like this:
Me: pounding rebar in from last night. Her: wandering around the racks of logs, measuring tape in hand, finding the log that will fit over the top of whatever crooked log we put up the day before. She keeps in mind the height of each course, the type of logs we already have up on whatever course we’re on (monster or regular, knotty or clean, etc.). She’s also looking for which log will match the log next to it- ideally, for each course, you find four logs that have the same bottom and top diameter. She’s also thinking about where the windows are, the stairs, the bathrooms, the doors, the kitchen cabinets, etc., etc., and which log will look best in each location. Each log has it’s own quirks- they bow in different directions, have odd knots, may not match the one below, or may match the one below perfectly. I do a bit of surgery on each log- cutting off a knot here or there to make it fit better with the one below. It is a lot of thinking and measuring.
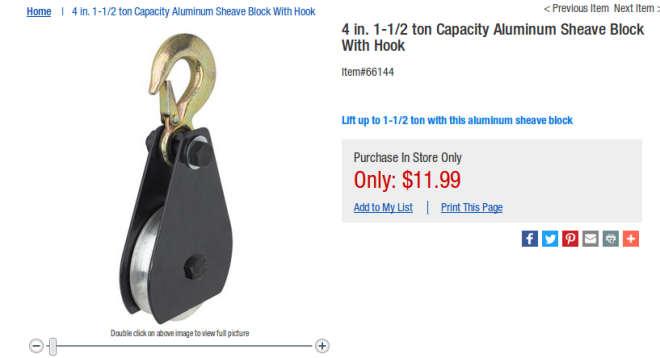
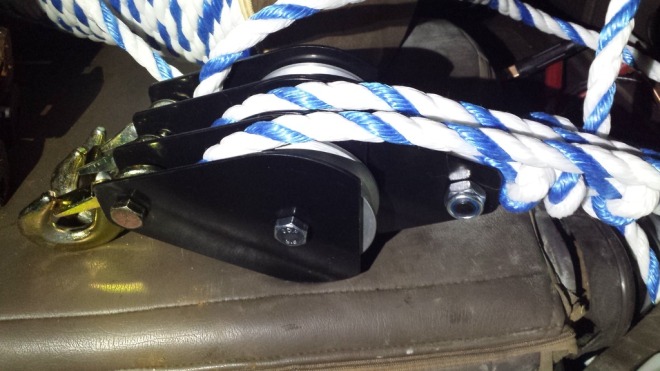
When I’m done pinning, I go find the log she marked with an oil pastel (doesn’t wash off as easily as chalk) and drag it over to the house. We proceed to lift the log using the tractor and the block and tackle into position. I like to get it up there, then fine tune it. She likes to make sure it will fit before lifting it. So we argue a little over the method- sometimes she’s right, sometimes I’m right. Eventually the log gets where it’s going. I cut off the obvious knots and lower it down. We end up having to position it with the tractor for the vertical placement, and the car for the horizontal placement.
With these huge twisty monster logs on the lower layers, this process has been taking more than a night, but when it’s exactly right, I place enough rebar in it to hold it until it’s too dark to work, then we go home. Our evenings begin around 4:00 pm, and we usually pack up and go home around 9:00 PM.
I’d like to speed things up, but with the crooked logs we are working with, there is a lot of turning the log this way and that until it fits as well as can be expected. But these are “monster logs” for the lower layers- some are more than six feet around at the base, or 24″+ in diameter. They take quite a bit of effort to place.
Progress is…..as expected
Of course, I always think things are going to go faster than they do. But we really are making good progress, considering the weather for this month. We’ve had so much rain, they declared the drought was over. In fact, there’s been so much rain that trees are falling over around the county.Rain causes quite a few issues- the tractor gets stuck, the logs are slippery, they get a little heavier when they’re wet, power equipment has to be kept dry, etc, etc. But I did find out something interesting: did you know that there’s no echo when beating rebar into a log during a downpour? My theory is that the raindrops absorb the sound. Go ahead- ask me how I know that…..
….And then there’s the heat
Yeah- when it’s not raining, the humidity started climbing along with the temperature. The last three days of last week, the heat index was 105. We delayed working on the cabin until early evening on those days. I usually end up soaked from sweat from head to toe. I bring a change of clothes for the drive home, and I go through about a gallon of water every evening. I shouldn’t work in the heat, but we want this so bad that I just push through it all. My amazing wife does laundry for me and repairs my jeans (I now own one pair without any repairs- she’s not happy about that, and banned me from wearing that one pair to the property).Lessons learned
One thing we’ve learned is how much you can use the crookedest logs- if you know where your doors and windows are going to be. We’ve placed the orneriest logs- logs that curved in all different directions- and they look really good. Had to place temporary lifting poles in the middle to hold them while I cut out the crooks, but when it’s all done, they really look good.Yes, you can remove a log after placing it. It’s not easy, but after pinning it once, then not liking it, I bought a sawzall from Harbor Freight, and cut all the rebar out of it while suspending it with the pulleys. I turned it and pinned it again, but ended up not liking that position either. So I cut it again, then carefully pulled it out. It just wasn’t working. I don’t recommend it- we lost a day’s worth of progress, but, in the words of my late friend Ken Hieronymi, “I guess I’ll just eventually go crazy from every time I come out here and see that [log] hanging there all cock-eyed.” Didn’t want that to happen, so I pulled the beast out of there.
The neat thing is, the logs look better up than they do down. Seems obvious, but until they are stacked, you can’t get an idea of how the whole thing is going to look. One thing we’re both really happy with is that we made the butts of the logs face the front and back of the house. That’s how I wanted it, but my wife thought it might look better with the tips of the logs facing the front- so that the huge logs wouldn’t distract from the look of the place. We put the discussion on the LHBA forum- and a lot of people said they wished they had gone with my idea. Then one guy said to think about how the roof overhang is going to be supported- with the tips of the logs or the butts? So, for strength, we went with the butts facing the front and back- and it looks so good! Because it’s a 40×40, we needed to offset the mass of the house with some massive looking logs- and boy do those butts look good! I just realized this is starting to sound like some other kind of discussion, but I assure you, I’m not going there!
See:


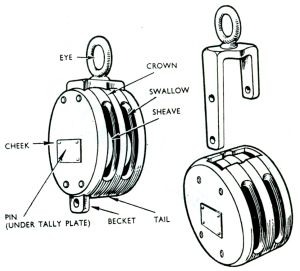
 . I didn’t have one, so I took two extra plates from a single pulley, and put a bolt through them.