Improving techniques
Jack hammer is pretty good
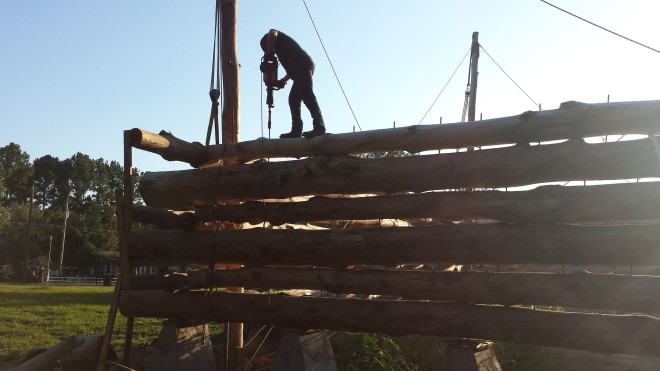
The jack hammer cost me about $130. I don’t know if it’s a monster jack hammer or just a regular one, having never owned a jack hammer before now. But it is definitely heavy- I think it weighs close to 50 pounds. I also ordered a “rod driver bit” to go with it. The rod driver bit is usually for driving electrical grounding rods into the ground. If your home was built in the last 20 years or so, you probably have one of these- it’s to prevent an electrical surge from frying the wiring in your house. The contractor will hammer a 6 foot piece of (usually) copper into the ground, and the easiest way to do it is with a jack hammer.
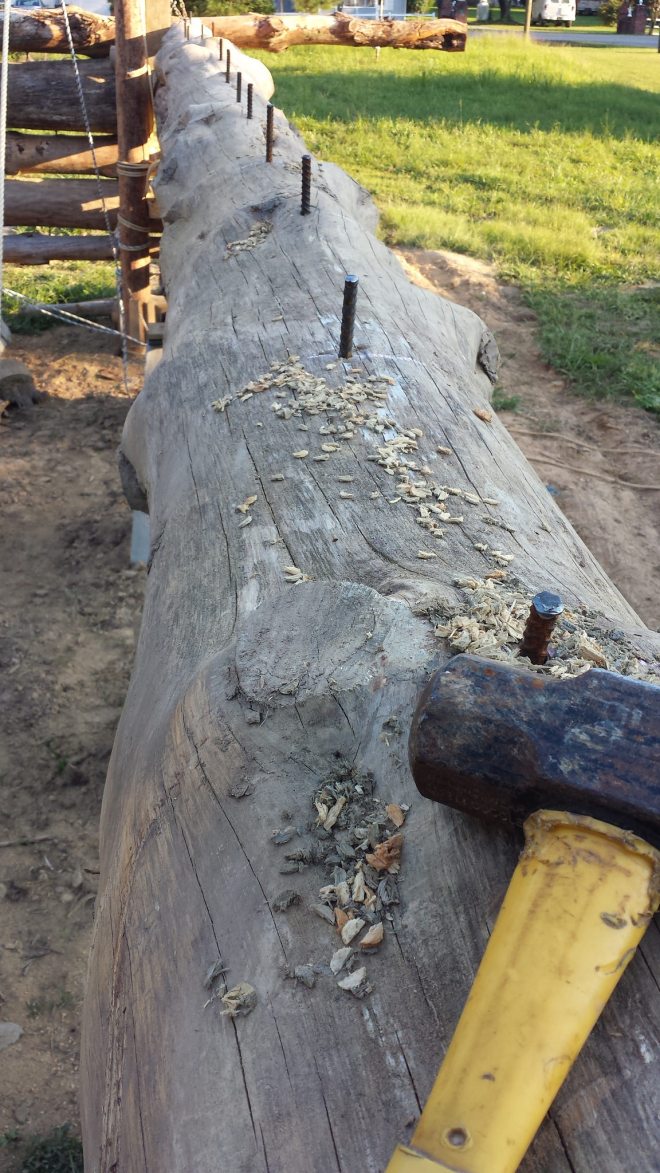
Driving rebar into logs is pretty much the same idea. The bit is just a shaft with a cylindrical hole in the end that fits over the rebar. I drive the rebar as far as I can into the log which leaves about 3 inches for me to finish pounding in by hand, which is very do-able, and it sure beats pounding the whole 20 inch piece of rebar with a sledge hammer. Instead of taking about 8 minutes per rebar, it now takes about 10-20 seconds with the jack hammer, and then about 1 minute with the sledge hammer. So I can finish pinning an entire log in about 30 minutes, instead of about 2 hours. And not as tired, either.
Chainsaw needs some adjusting
Last night, my neighbor was asking how it’s going- I told him slow. When making any straight down cut with my chainsaw lately, the saw wants to veer off towards the left and do this weird curvy cut. The neighbor asked if the blade was straight- yeah, I just bought it about two weeks ago. Then he asked when the last time I sharpened it, was I sitting behind the saw or in front of it? Ummmmm- I was sitting behind it. He said try sharpening it with the blade facing me- sitting behind it makes one set of teeth uneven. Huh. I had no idea, so I tried it on Saturday: I cleaned the whole thing, sharpened it, and went that afternoon to make some cuts- nope. Still curvy. My other saw- the McCollough- gave up the ghost. The repair shop said the piston and rings are no good, and the saw is so old, they don’t make parts for them. I’m going to try another blade and chain on my Husky, since it looks like I’ll be using this saw for quite a while yet.What are temporary lifting poles?
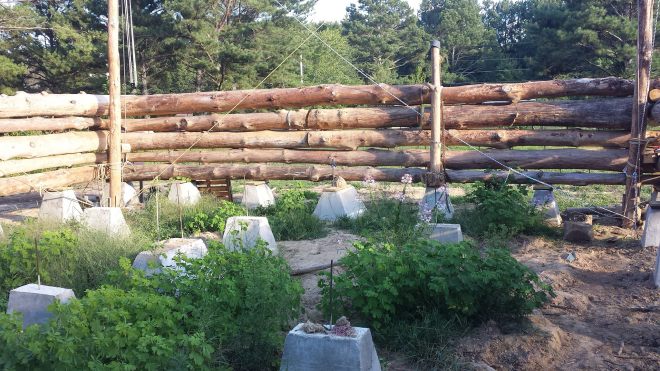
This is a necessity. What happens is this: all of our logs are crooked, and we are using the crookedest ones first because of all the doors and windows on the first floor- the doors and windows make it easy to cut the crookedest part of the log right at the door or window, and then roll the log this way and that way to make it sit better and get it straightened out for pinning.The problem is that when you cut a log in the middle, you have to support it somehow. With the lifting poles in the corner, you need something temporary to hold the log at the cut so it doesn’t roll off the wall. So I use the last 10 – 15 feet of a log as a temporary lifting pole, and stand it up on the pier. I chain-bind it to the existing wall logs, and put a pulley or chain hoist on top and suspend the log I’m about to cut with it. I make the cut, do any adjusting to straighten out the bows or knots, and then pin the log. Then I take down the lifting pole and use it for the next location.
Plans change…
We wanted a back door, we didn’t want one….Now we want one. While stacking logs, it became apparent that if we added a door on the back of the house, we could use more logs that were crooked. We also redesigned the kitchen- now, instead of separating the laundry room from the kitchen with a wall, we took out the wall between the kitchen and laundry on the plans, and opened up the laundry area and kitchen to each other. Now, when you enter the house from the side-back door, the laundry is on the right, and the kitchen is on the left- opening up a lot more space. I still need to update the CAD drawings, but I’ll get to it eventually. So far, the inspector hasn’t come out and asked to see the plans, and the copy I emailed him- well, he said it was too small to read. If I update them before he asks for them….I guess he’ll never know the difference?Next item, please
At this point in their builds, many LHBA members begin to put in the RPSL logs that hold up the roof. These logs are bolted to the wall logs at the front and back center of the house, and will be 30 feet tall in our case. The reasoning on why to put them in at this point is that if the walls are higher than the fifth or sixth course, it’s too hard to get them over the wall. In our case, with a pier foundation, we can just slide them under the house, then lift them up on the inside. Our “advantage” is that our house is forty feet long, which makes it easy to work with a thirty foot log inside it. Our other “advantage” is that we are using lifting poles and block and tackle instead of a telehandler.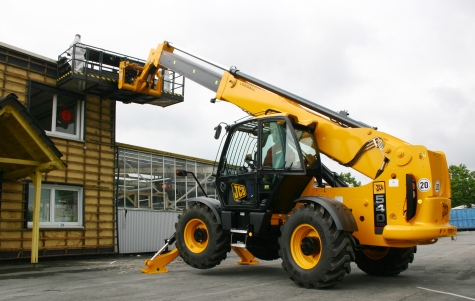
I put “advantage” in quotes because most folks using a telehandler would snicker about how these two items- a forty foot home and lifting poles – are an advantage.
But they would probably admit that I’m right in this case. Of course, they would say all the advantages of otherwise having a telehandler outweigh these two drawbacks, whereupon I am reminded that a cheap telehandler is about $8,000 (I’m guessing the one in the photo would be about $70K+), whereas my lifting poles were free, and my lifting equipment was about $400. Sure, they’re slow, but I’ve already had a guy who is using a crane on his build state that I’m stacking faster than he is. Weird.
I guess we’ll wait to do the RPSL’s. The book shows a diagram of how to lift the girder log and RPSL’s and the ridge pole into place using nothing but block and tackle. Sort of a step-by-step. It looks like if we finish the walls first, we can use the walls to attach rigging anywhere we want and get the RPSL’s “just so”. If I try to get them in now, the only thing I have that’s taller that the RPSL’s now is my corner lifting poles, and I don’t want to put that much lateral force on the poles- they could snap off if I lift something very heavy too far away from their centers.